There are many types of stock photography, just as many as there are stock users. What works for one type of use may be only semi-useful for others. Especially when it comes to stock for photomanipulations, different “rules” apply than for editorial use. This article aims to show you the difference so you can choose (or shoot) more useful stock images for your photomanipulation projects.
For example, if you are an editor looking for a photo to illustrate an article, you are looking for something interesting, eye-catching and (most importantly) ready to use. But if you are trying to find bits and pieces you can cut out and place in another scene, the image has to be chosen with that in mind. Especially people new to photomanipulation tend to go for the flashy images, though – thinking that with a great starting point, their work will be easier. While a good quality image will indeed make your finished product look better, “good quality” and “great to look at” are not necessarily the same thing (something can be great quality, but still not very usable).
1. Cropped Off Subject
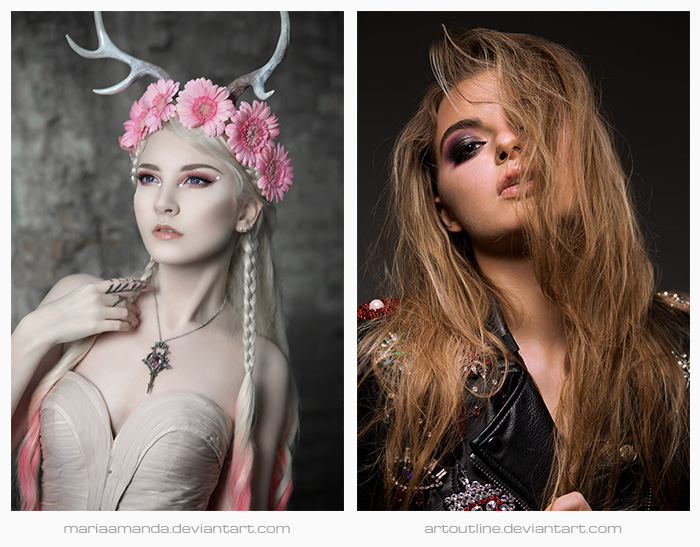
If the photo only shows part of the subject, you will run into problems if you want to place the subject so that there is space on that side. For example, if the crop is such that the left shulder/arm is slightly cut off a portrait style picture, you will not be able to extend the canvas easily to that side (because you’d need to paint the arm in). Often pictures look better when they are cropped a bit (when the composition works better with the crop). But if you need those parts, you may need to find a different image to use.
2. Hidden Subject
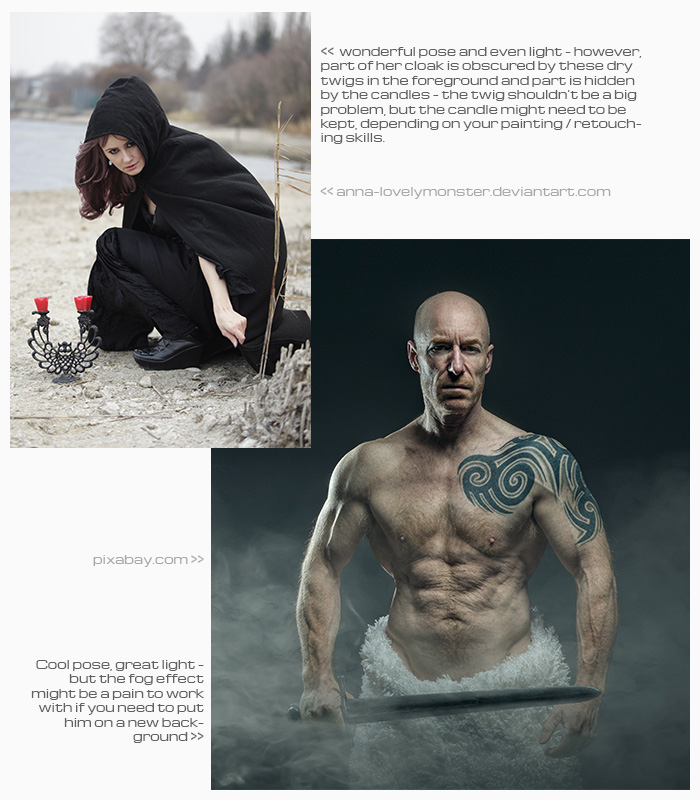
Even if you have the subject fully in the frame, it pays to watch out for vegetation growing in front of it, or sand covering toes, or… We often do not realize how much stuff might be in the way while looking at a zoomed out picture. Especially if we really like the pose of the model (happens to me constantly). Of course, some things are easy to fix (question is if you really want to spend the time for it). For example, stray grass on parts of a dress can easiliy be removed in Photoshop, however, if she is standing in a meadow and you cannot see her feet because of it, you will have no choice but to keep part of the grass in your composition or it will look very odd. Similarly, fog effects look great, but if they obscure your subject it may result in you not being able to actually cut it out without taking part of the fog with you (which can be quite tricky to do).
3. Shallow Depth of Field
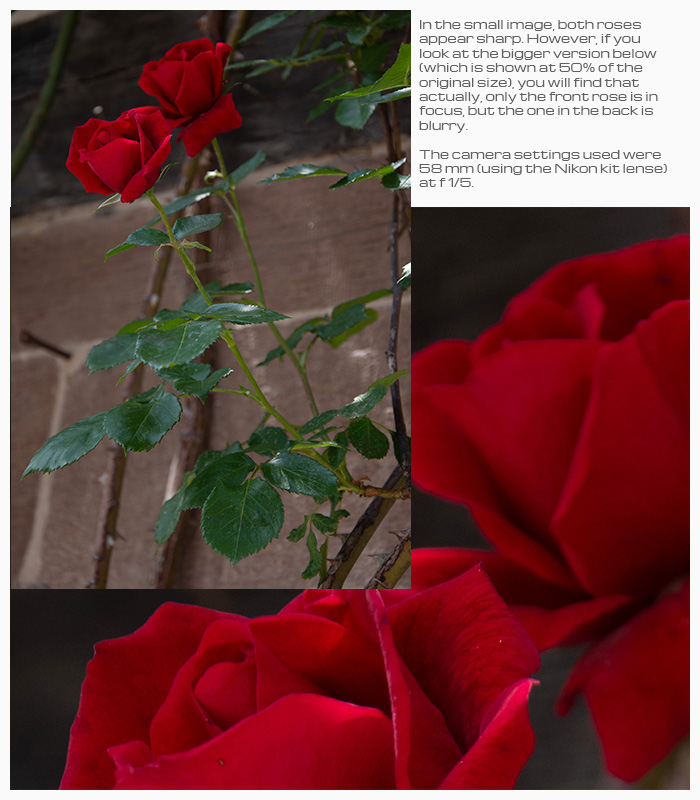
Depth of Field, or rather the lack thereof results in a blur on parts of the image. This can often be seen in photographs of flowers or other smaller objects, where only one spot is really sharp and the rest gets blurred out. It makes for a beautiful, eye-catching effect, but may leave you wondering how to cut that rose out if half of it isn’t sharp… If you are only using said rose as a small accessory it may not matter in the end, but if you want to use it as a bigger item along with other things that are crystal clear, it will most certainly look off.
4. Harsh or Uneven Lighting
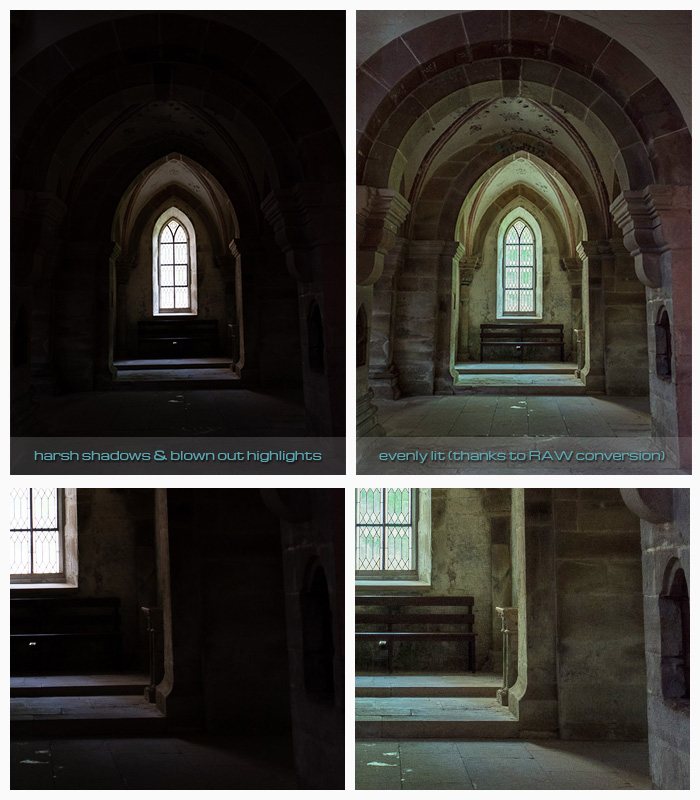
Dark shadows and super bright highlights can look dramatic and really make an image pop. But if you are going to try to incorporate one image with such drastic lighting into a scene of different photos, chances are it will drive you nuts. Because if you compose a scene, you will need to create the illusion that the light is coming from one source for all the components. If you have one image lit from the back, one image from the side, etc and all of them have been shot in harsh lighting conditions (such as direct sunlight), it will be nearly impossible to match them all up. If you choose images shot in the shade or evenly-lit studio shots instead, you will have it much easier.Btw, the very worst thing is direct sunlight coming through trees where you get spots with direct light next to shadowed parts.
5. Post-processed Images
Now I do not mean any picture dragged through Lightroom or Photoshop. Post-processing is in my opinion an integral part of taking pictures, which the example above shows quite well: if it hadn’t been for the possibility to regain those dark and light tones through RAW processing, the image would have been unusable. Also, removing tourist info signs, garbage bins and the like helps the image look clean and ready to use.
What I mean instead are images that have been processed for a certain look that may be hard to “get back to neutral” to fit in with other images you want to use. For example, if they are super-bright or have a filter on that washes out the colours. Anything that will make it hard to put together with other images and blend it properly.
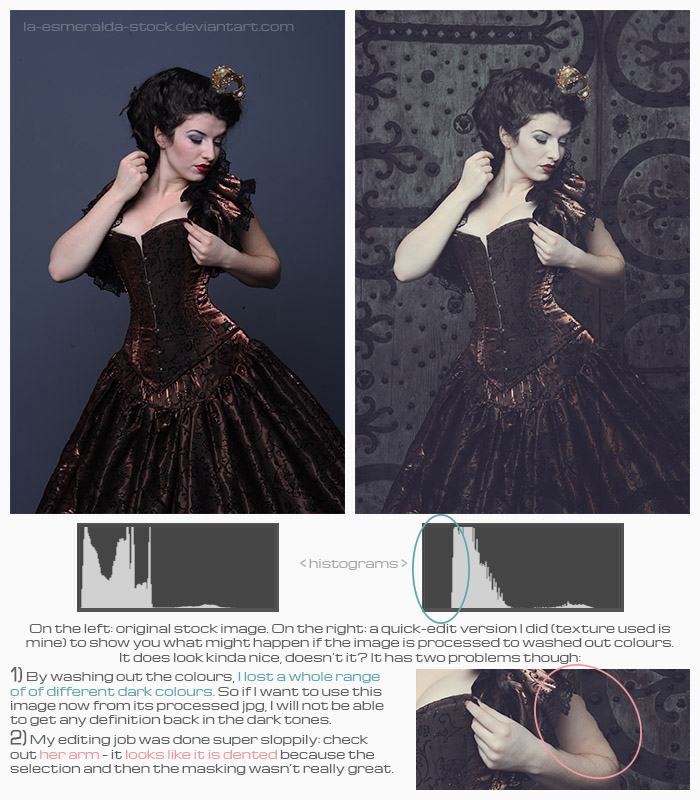
Of course, there are always situations when you may want to go with a cropped / processed / unevenly lit image. Either because you are putting it together with similar looking photos anyway or because you are not planning on cutting something out and putting it on a completely different background anyway or maybe you know you can deal with the issue in another way… But if you are a beginner and trying to make things a bit easier, it is definitely worth keeping these things in mind
What about you?
- How do you choose your stock?
- Did I forget your favourite “lessons learned”?
- Do you have any special techniques you like to apply to deal with some of the above issues?
- Would you be interested in knowing how I deal with these?
I’d love to know in the comments below!

PS: If you like what you see and you have a deviantArt account, you can show your appreciation also there with a comment or fave <3
3 comments on “How to choose stock for photomanipulations”